Cantilever Bridge on Implants: What It Is, When to Use It, and How It Performs

At West Valley Dental, our implant team places and restores dental implants every week. Our doctors have advanced training in implant surgery and prosthetics, use 3D imaging and digital design, and review current peer-reviewed research. This article was written and clinically reviewed by our implant providers to give you clear, trustworthy guidance. We'll start with straight answers, then add detail so you can make an informed decision.
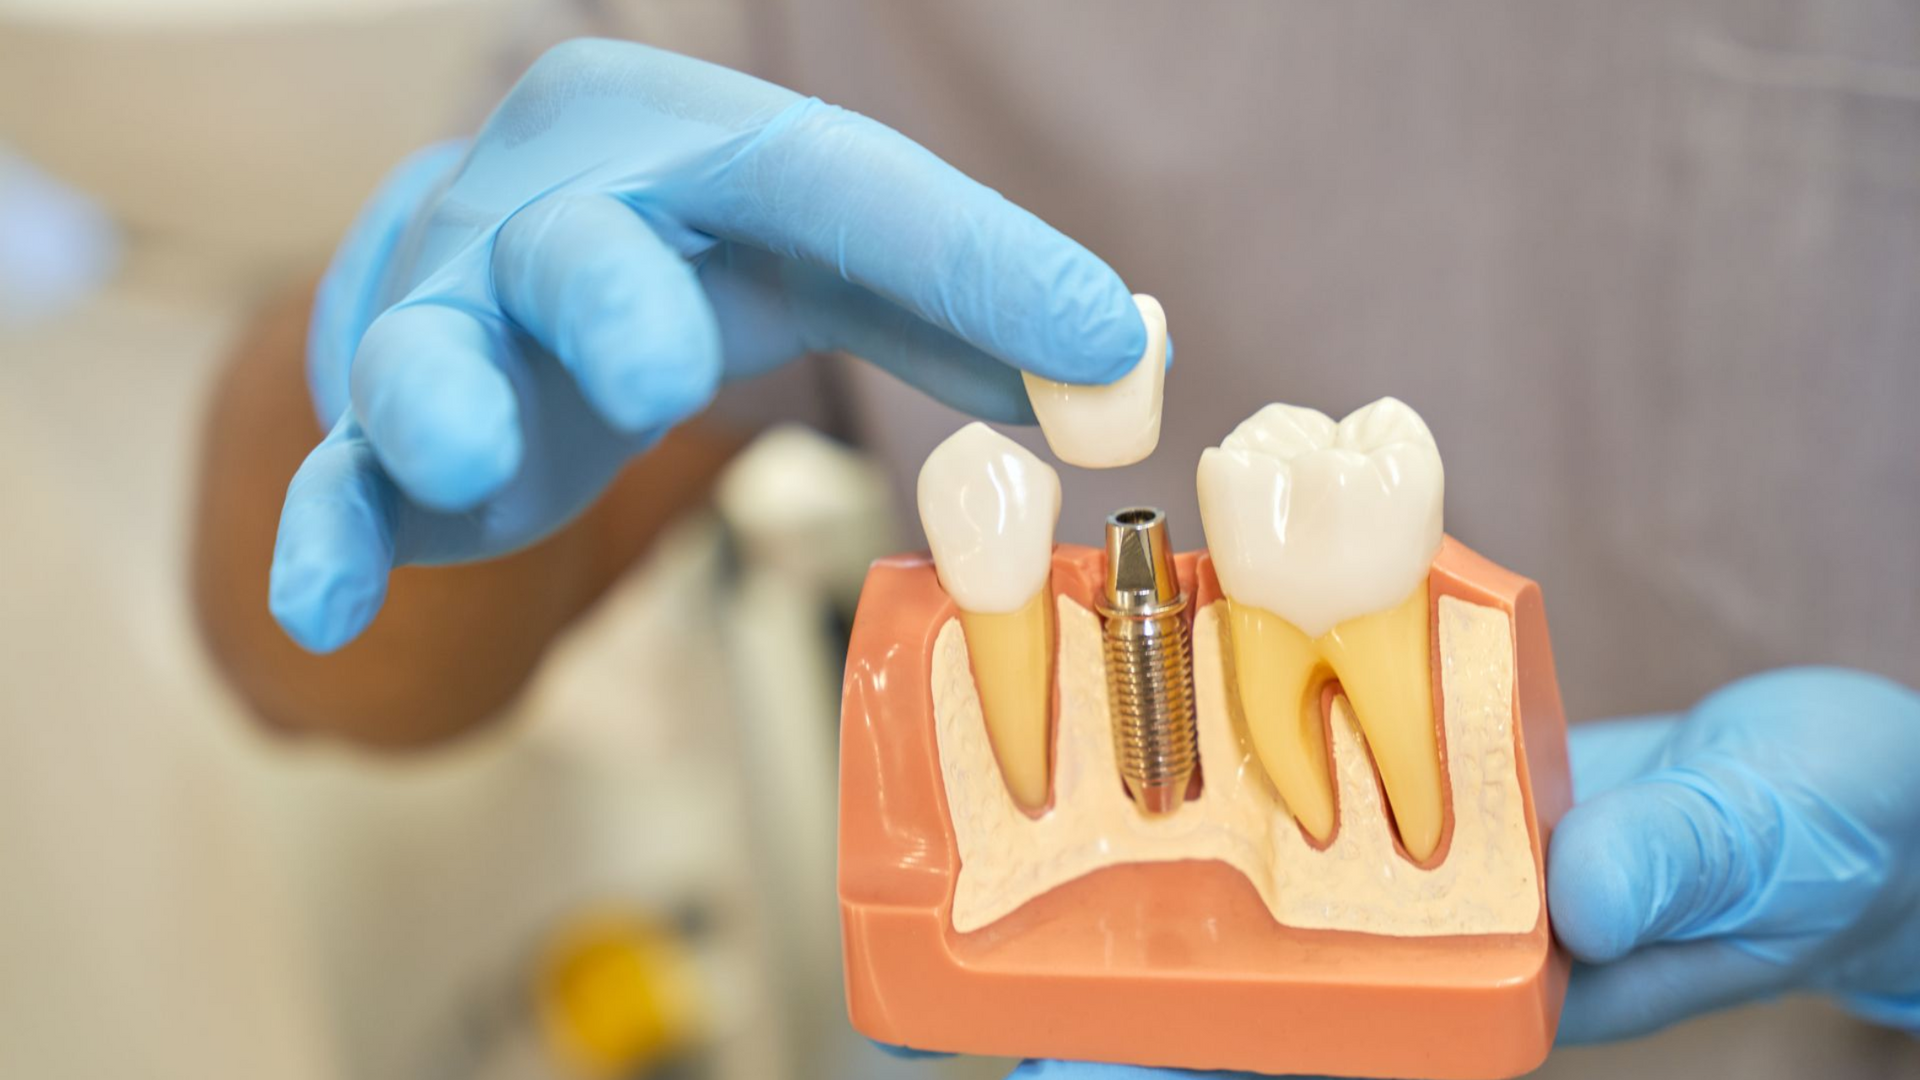
A cantilever bridge on an implant replaces a missing tooth using one implant to support two connected crowns, one sits on the implant, the other “extends” to fill the gap. It works best for small spaces (often in the front), short spans, and controlled bites. It can look very natural and avoid placing a second implant, but it requires careful design and ongoing maintenance to limit risks like screw loosening or chipping.
What is a Cantilever Implant Bridge?
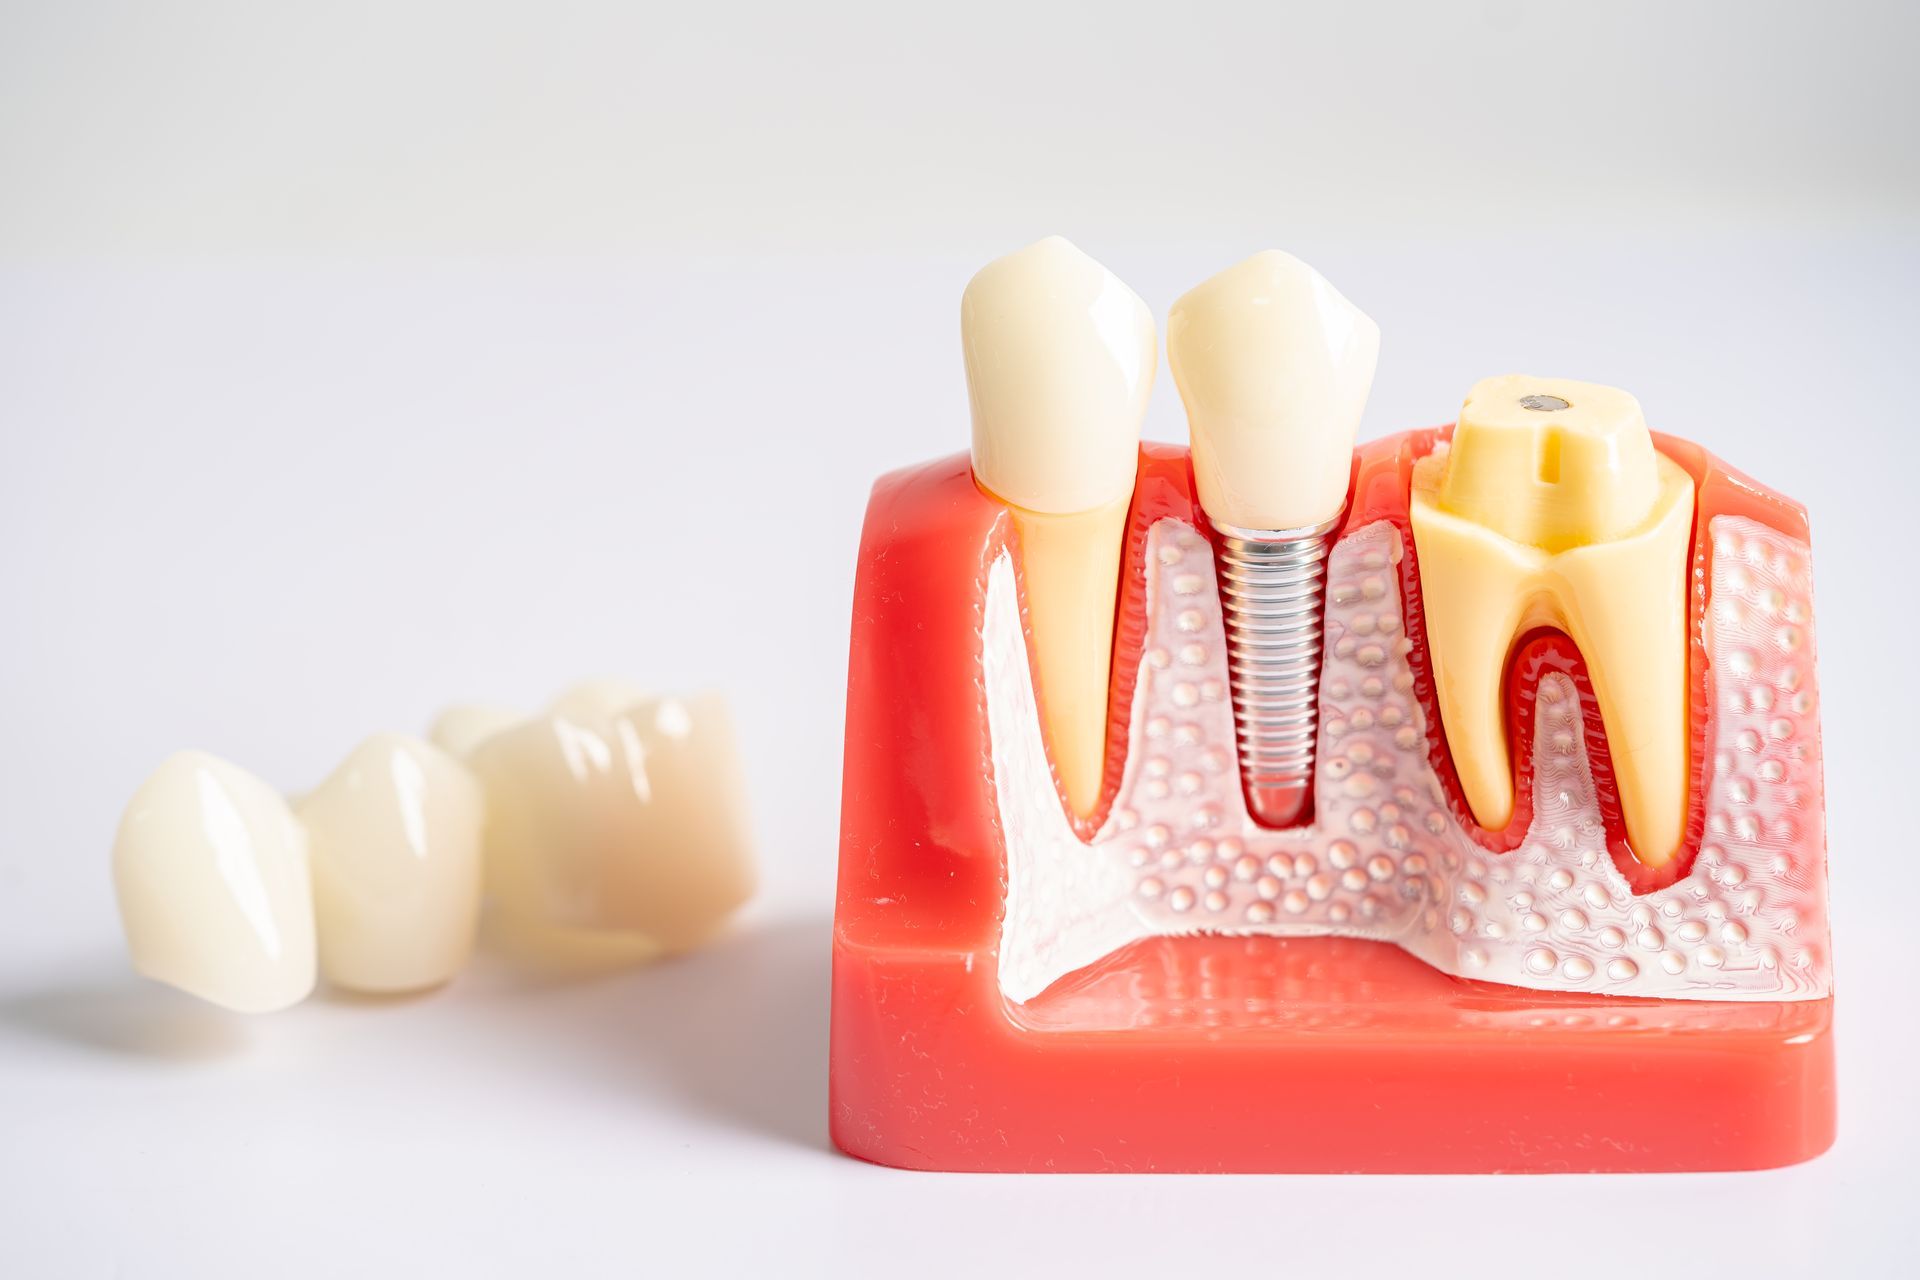
A cantilever implant bridge is a fixed replacement where a single implant supports a two-tooth unit. One crown attaches directly to the implant. The second crown “cantilevers” to one side without its own implant. Think of a sturdy shelf bracket: secure on one end, extending on the other.
How it differs from traditional tooth-supported bridges and single-tooth implants
- Traditional bridge: Neighboring natural teeth are trimmed for crowns to hold a replacement tooth in between. It can work well, but it changes healthy teeth. Learn more about
traditional fixed dental bridges.
- Single-tooth implant: One implant supports one crown. No extension, less leverage on parts. Explore
implant-supported crowns.
- Cantilever implant bridge: One implant supports two crowns. You avoid placing a second implant or preparing natural teeth, but you add leverage that must be controlled through design.
Two-unit FDP on a single implant (typical configuration)
The most common setup is a two-unit fixed dental prosthesis (FDP) on one implant. The “implant crown” is the abutment-supported unit. The “cantilever crown” extends off the side, kept short and light in contact to protect the parts. Most modern cases are screw-retained to make service and cleaning easier.
Indications & Case Selection
Good results depend on choosing the right situations. We look at tooth position, bite forces, smile goals, and hygiene access.
Anterior vs. posterior use cases
- Anterior (front teeth): Often ideal. Bite forces are lighter, and spaces are small, like a missing lateral incisor next to a central incisor implant. Esthetics are important, and a single implant with a short cantilever can blend in very well.
- Posterior (back teeth): Can work in select cases, but chewing loads are higher. Posterior cantilevers need extra caution, very short spans, and strong materials. In many back-to-tooth situations, two implants are the safer bet.
Mesial vs. distal cantilever positioning
- Mesial cantilever (toward the front): Often preferred when anatomy allows. Forces can be easier to manage, and hygiene access may be better.
- Distal cantilever (toward the back): Possible, but the leverage and bite forces are typically higher. We keep these as short as possible and use a careful bite design.
Occlusion, parafunction, and bruxism considerations
If you clench or grind (bruxism), forces spike and may cause screw loosening, chipping, or rare fractures. We screen for parafunction, lighten contacts on the cantilevered tooth, use protective bite designs, and often recommend a nightguard. In heavy bruxism, a cantilever may not be the best choice.
Bone volume, soft-tissue profile, and smile-line factors
Enough bone is needed for a stable implant in the right position. Healthy gums and a favorable smile line help the bridge look real. A high smile line needs extra attention to the gum shape (pink esthetics) and tooth shade/texture (white esthetics) so the extension disappears in your smile.
Biomechanics & Design Principles
Design is everything. We manage leverage, materials, and bite contacts to reduce stress.
Cantilever length guidelines and crown-to-implant ratio
The shorter the cantilever, the safer. We also look at the crown-to-implant ratio, how tall the crowns are compared to the implant’s support. Favorable ratios and short spans reduce bending forces and help prevent loosening or chipping.
Implant diameter/length and platform connection choices
When bone allows, a wider or longer implant can improve stability. A strong internal connection and precise abutment fit limit micromovement at the screw joint. These small engineering details make a big difference in long-term success.
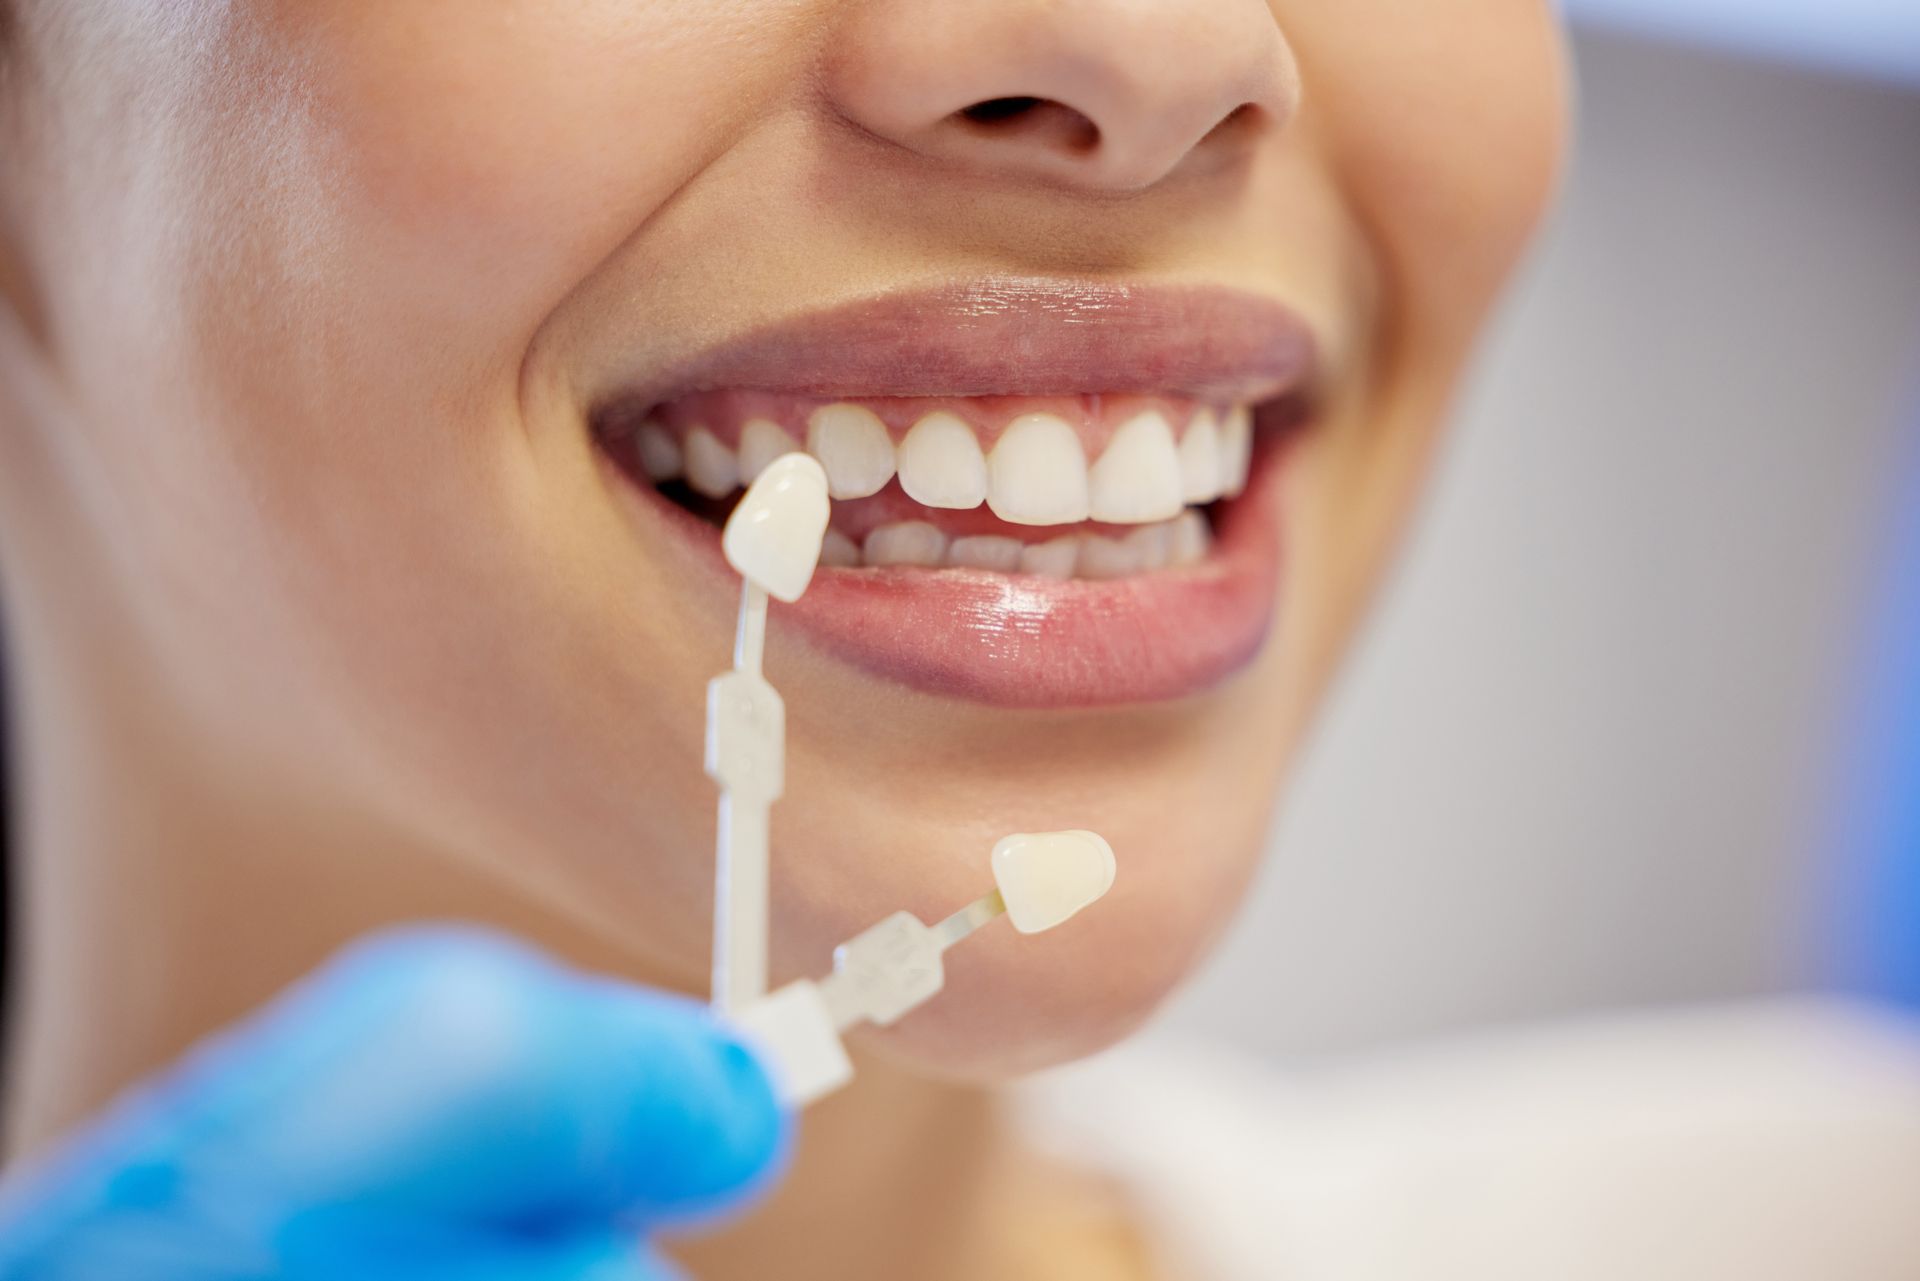
Material selection (zirconia, metal-ceramic, monolithic vs. layered)
- Monolithic zirconia: Very strong, chip-resistant, great for high-load areas; modern versions can look highly natural.
- Metal-ceramic (PFM): Proven, beautiful, but layered porcelain can chip if overloaded.
- Hybrid approach: Keep functional surfaces monolithic (strong), layer ceramic only where esthetics demand it.
Occlusal scheme and load distribution
We adjust the bite so the cantilevered tooth has light contact in biting and minimal contact in side movements. The goal: spread the load, protect the screw joint, and keep the prosthesis stable.
Clinical Workflow
Clear steps lead to predictable results. Here’s how we plan and deliver a cantilever implant bridge.
Assessment, diagnostics, and digital planning
- Review medical and dental history, including gum health and grinding habits.
- 3D imaging (CBCT) to map bone and vital structures.
- Digital scans and a diagnostic wax-up to preview the final tooth shape and bite.
- Risk evaluation and a simple explanation of pros, cons, and alternatives.
Implant placement and provisionalization
We place the implant with the final crown positions in mind. When helpful, we use a provisional (temporary) to shape the gums and test the bite. Healing time depends on bone quality and stability.
Impression/scan, CAD/CAM design, try-in
We take precise digital scans, design the bridge with CAD/CAM, and verify the fit, gum contours, shade, and bite during a try-in. Small adjustments are made here, before final fabrication.
Final delivery and torque protocol
We typically deliver a screw-retained prosthesis so we can retrieve it easily for cleaning or repair. We torque the screw to the manufacturer’s specification and seal the access for a natural finish. Then we re-check the bite and polish everything smooth.
Outcomes & Evidence
Cantilever implant bridges can be reliable in well-selected cases with careful design and maintenance.
Prosthesis survival vs. implant survival
We track two success measures:
- Implant survival: The implant stays integrated and healthy in the bone.
- Prosthesis survival: The bridge remains in service, even if minor repairs or screw checks are needed over time.
It’s possible for the implant to be fine but the prosthesis to need maintenance if the extension is overloaded. That’s why design and follow-up matter.
Mechanical complications (screw loosening, chipping, framework/abutment fracture)
The most common issues are screw loosening and chipping of veneering ceramic. Both are manageable, tightening a screw or polishing/repairing porcelain is routine. Framework or abutment fractures are uncommon but more serious; we reduce that risk by keeping the cantilever short, using strong materials, and setting a careful bite.
Biological outcomes (peri-implant tissue health, marginal bone loss)
Smooth, cleanable contours and good hygiene limit inflammation around implants. We monitor marginal bone levels with periodic X-rays and check the gums for early signs of irritation (mucositis). Stable tissues and tight connections support long-term health.
Factors that modify risk (parafunction, span length, implant position, short implants)
- Parafunction (grinding): Use a nightguard and a protective bite scheme, or choose a different plan if risk is high.
- Span length: Shorter cantilevers do better.
- Implant position: Place the implant where it supports the load straight down the long axis.
- Short implants: Can work in the back when combined with careful design and light contacts, but require extra planning.
Maintenance & Follow-Up
A cantilever bridge is a partnership: good home care and regular checks keep it strong.
Home care and hygiene access under the cantilever
Clean daily with super-floss, interdental brushes, or a water flosser under the extension. Brush the gumline gently. These simple habits protect the tissues and the implant.
Recall intervals, screw checks, and occlusal adjustments
We recommend routine checkups to confirm torque, review X-rays, and fine-tune the bite as your mouth adapts. Small tweaks, done early, prevent bigger problems.
Signs that warrant intervention
Call us if you notice:
- A clicking sound or slight movement
- Chipping, rough edges, or sharp spots
- Redness, bleeding, or swelling around the implant
- Food trapping you can’t clean out
The sooner we see you, the simpler the fix. Contact us for a dental emergency if you experience severe symptoms.
Alternatives & Decision Pathway
There isn’t one “right” solution for everyone. We tailor treatment to your goals, bite, and budget.
Multiple implants, traditional fixed bridge, resin-bonded/Maryland bridge, removable partials
- Two implants (one per tooth): Very stable and ideal for back teeth; higher cost and additional surgery. See our implant-supported bridges.
- Tooth-supported bridge: No implant surgery, faster timeline; requires preparing neighboring teeth. Learn about dental crowns and bridges.
- Resin-bonded/Maryland bridge: Conservative option for small front-tooth spaces and light bites; may have a higher chance of debonding over time.
- Removable partial denture: Budget-friendly and repairable; not fixed in place and can feel bulkier. Explore partial dentures.
When to avoid a cantilever
We usually avoid a cantilever when there is heavy bruxism without a nightguard, a long span, poor hygiene access, very high chewing loads in the back, or when implant position cannot support the extension safely. In those cases, two implants or a different fixed solution is smarter.
Esthetics & Patient Experience
Our goal is a tooth that looks and feels like it’s your own.
Emergence profile, pink/white esthetics, and soft-tissue management
We use provisionals to shape the emergence profile, the way the crown rises from the gums, so it mimics a natural tooth. Shade, translucency, and surface texture are matched to the neighbors. When the gum line shows when you smile, we take extra care with contours so the tissue looks even and healthy. Our cosmetic dentistry expertise ensures natural-looking results.
Managing patient expectations and comfort
You’ll see a digital preview and approve the plan. Most people feel normal within a few days after delivery. If something feels “high” or rough, we adjust it quickly. We’ll also review how to clean under the cantilever so daily care is easy.
Cost & Value Considerations
Costs depend on surgery, parts, materials, and lab work. We'll give you a clear estimate before starting. Learn more about our insurance and financing options.
What drives cost (materials, surgery, lab)
- 3D imaging, surgical guides, and implant components
- Custom abutments and precision connections
- Material choice (monolithic zirconia vs. layered ceramics)
- CAD/CAM design, shade matching, and lab craftsmanship
- Follow-up visits for fine-tuning and maintenance
Longevity and maintenance implications
A cantilever bridge can save you from placing a second implant and reduce surgery. Over time, plan for routine checks, possible screw re-torque, bite adjustments, and the occasional porcelain repair. We design for serviceability so maintenance is simple and affordable.
Candidate Checklist
Ideal clinical and lifestyle criteria at a glance
- Missing a single small tooth next to a good implant site
- Healthy gums and enough bone for stable placement
- Short span and controlled bite forces (especially in the front)
- No heavy grinding, or willing to wear a nightguard
- Committed to daily cleaning under the bridge and regular checkups
- Wants a fixed, natural-looking solution with minimal surgery
Summary & Next Steps
Key takeaways for patients
- A
cantilever bridge on implant replaces a missing tooth using one implant and two connected crowns.
- Best for small, front-tooth spaces and short spans with controlled bite forces.
- Success depends on short cantilever length, strong materials, precise implant position, and a protective bite.
- Main risks are
implant-supported cantilever bridge complications like screw loosening or chipping, managed with design and maintenance.
- Alternatives include two implants, a traditional tooth-supported bridge, a resin-bonded bridge, or a removable partial.
If you're considering a cantilever bridge, our team will evaluate bone, gums, and bite; review crown-to-implant ratio and cantilever length; and help you choose materials that balance strength and esthetics. Schedule a consultation to see which option is safest and most natural-looking for your smile, no sales pressure, just clear guidance.

Frequently Asked Questions
How long does a cantilever bridge on an implant last?
With proper care and regular maintenance, a cantilever implant bridge can last 10-15 years or longer. The implant itself often lasts a lifetime, while the prosthesis may need occasional adjustments or repairs. Success depends on keeping the cantilever short, managing bite forces, maintaining excellent oral hygiene, and attending routine checkups for screw checks and bite adjustments.
Can I get a cantilever bridge if I grind my teeth?
Teeth grinding (bruxism) significantly increases stress on cantilever bridges and raises the risk of complications like screw loosening or chipping. If you grind your teeth, we'll typically recommend wearing a nightguard to protect the bridge and may adjust the bite to reduce forces on the cantilevered tooth. In cases of severe, uncontrolled bruxism, a cantilever may not be appropriate, and we'd explore alternatives like placing two separate implants instead.
Is a cantilever bridge cheaper than getting two implants?
Yes, a cantilever bridge typically costs less than placing two individual implants because it requires only one surgical site, one implant fixture, and one abutment connection. However, the total cost depends on factors like materials chosen (zirconia vs. metal-ceramic), 3D imaging, custom design work, and lab fabrication. While the upfront investment is lower, remember that cantilevers may require more frequent maintenance visits compared to two independent implants.
Will people be able to tell I have a cantilever bridge?
When properly designed and placed in the right situation, a cantilever bridge should be virtually indistinguishable from natural teeth. We carefully match the shade, shape, translucency, and surface texture to your existing teeth. The emergence profile is shaped to mimic how a natural tooth rises from the gums. For front teeth with visible gum lines, we pay extra attention to pink esthetics (gum contours) and white esthetics (tooth appearance) to ensure the extension blends seamlessly into your smile.
What happens if my cantilever bridge fails?
Cantilever bridge "failure" usually means a mechanical issue with the prosthesis, not the implant itself. The most common problems, screw loosening or porcelain chipping are typically minor and easily repaired during a routine visit. We can tighten the screw or polish and repair ceramic. If the bridge itself becomes damaged beyond simple repair, we can fabricate a new prosthesis while the implant remains in place. True implant failure (loss of bone integration) is rare with proper case selection and maintenance, but would require evaluation for implant replacement or an alternative treatment approach.